If you’re looking to create an eCommerce website with WordPress, you’re in luck. WordPress is one of the most popular content management systems (CMS) in the world, and it’s perfect for building your online store.
There are plenty of WordPress themes and plugins available to help you create a professional-looking website, and most of them are free. You’ll also need a hosting account and a domain name for your website.
In this article, we’ll show you how to create an eCommerce website with WordPress step by step. By the end, you’ll have a beautiful online store that’s ready to start selling products!
Let’s get started.
Build Your eCommerce Website with WordPress in Just 8 STEPS
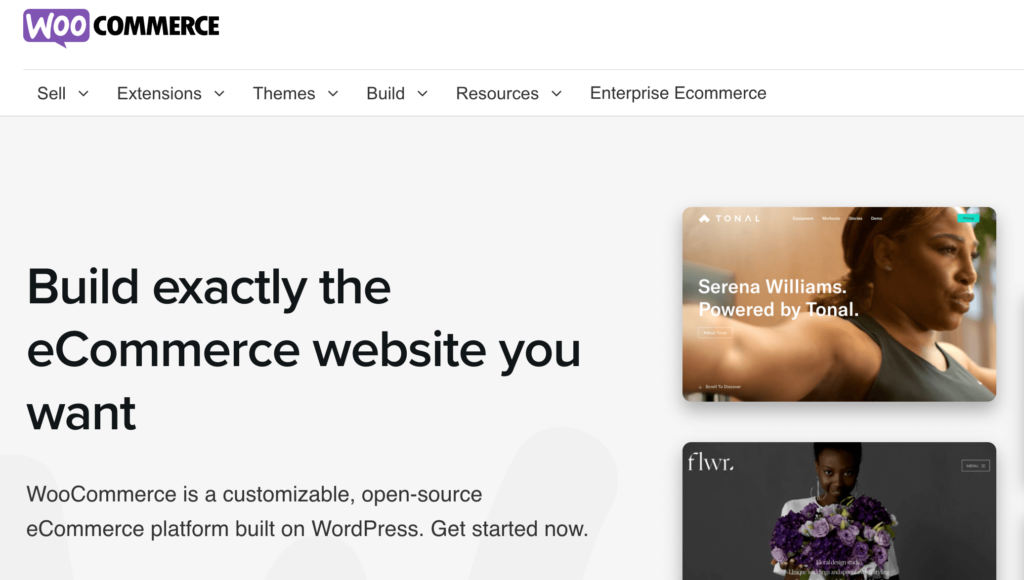
There are many WordPress eCommerce plugins available in the repository but will use the most famous eCommerce plugin WooCommerce to create our eCommerce site.
WooCommerce is free and customizable as more than 30% of online stores are using it to create eCommerce stores. Also, you can enhance its functionality even further with various paid and free extensions.
Steps to create an eCommerce site with WooCommerce.
- Choose an eCommerce store name
- Select a Hosting Provider
- Install WordPress (2 Ways)
- Install and Configure WooCommerce Plugin
- Choose a Responsive Store Theme
- Configure the Payment Methods
- Install Plugins for SEO, Security, and more
- Upload Products
Let’s see the details of these steps.
Step 1: Choose an eCommerce Store Name
You need to choose your store name. You have to make sure to choose a name that resembles your brand and also it is easy to remember. Because when you see famous eCommerce sites like Amazon, eBay, Etsy, Daraz, etc, they all have one thing in common. Their names are only one word and easy to say and write.
Step 2: Select a Hosting Provider
After selecting your store name, you need to select a reliable hosting provider. Every website needs hosting. You need to be very careful while choosing a hosting provider because the website’s speed, performance, storage, and traffic depend on it.
Avoid shared hosting.
You can choose from popular WordPress hosting providers like Bluehost, Hostinger, Conversio, and Siteground you can buy your hosting. The most interesting part is, they have a built-in installer so you can get WordPress up and running in just a few clicks.
Step 3: Install WordPress
You can install WordPress in two ways, one-click installation from your hosting dashboard or manual installation from WordPress.org.
When you are selecting your hosting provider, you need to look for the feature of a one-click WordPress installation. All you have to do is log into your hosting and hit the button that says Install WordPress.
But, if your hosting provider doesn’t have this feature, you have to manually download the WordPress software from WordPress.org and upload it to your hosting dashboard.
Step 4: Install & Configure WooCommerce
Now you have to install WooCommerce and start building your eCommerce site.
Go and login to your WordPress dashboard and go to Plugins–> Add New. In the search box type WooCommerce. Then just install and activate the plugin.

After activating the plugin you need to finish the setup wizard with the necessary details,
- Store Details
- Industry Details
- Product Types
- Business Details
- Theme
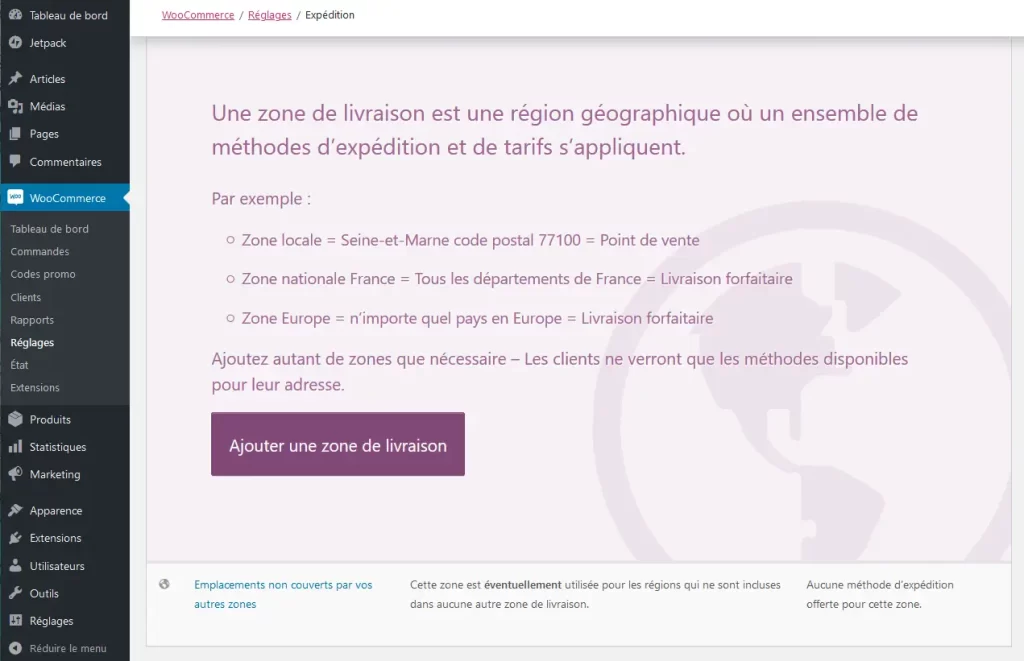
Configure Shipping Options
You can find WooCommerce’s own built-in shipping features. You can easily set shipping zones and add shipping methods. There are three types of shipping methods,
- Flat rate
- Free shipping
- Local pickup.
When you add a method, you need to enter its cost. In order to explore the built-in shipping settings, go to WooCommerce → Settings → Shipping.
Configure Emails to Send to Your Customers
Go to WooCommerce → Settings → Emails. There you can configure the emails that you will send to the customers and admins. You will find emails such as the email that a shopper receives after they place an order.

Create the Necessary Pages
After finishing configuring the settings, you have to create the necessary pages for your eCommerce store. When you install WooCoomerce, it automatically creates,
- Cart page
- Checkout page
- My Account page
- Shop (product) page
- Privacy policy page
- Refund and Return policy page.

Step 5: Choose a Responsive Store Theme
There are many themes available in the WordPress repository. You can easily select one that goes with your store. These themes are customizable. If you add HTML and CSS codes, you can create a design that looks totally different from the original layout.
You can find popular themes like Astra, Hestia, Storefront, eStore, Shopkeeper, etc to install on your site.
If you want to select a theme, just go to Appearance–> Themes and click on Add new. Then, type the theme name, and install and activate the theme.

Step 6: Configure Payment Methods
WooCommerce has built-in payment methods available. Go to WooCommerce–> Settings–> Payments, you will find all the payment options available to you. You will find,
- WooCommerce Payments for credit/debit cards
- Direct bank transfer
- Check payments
- Cash on Delivery.
You need to configure them in order to use them on your eCommerce store.

If you want to you can use other third-party payment gateway plugins if needed.
Step 7: Install Plugins for SEO & Security
You need to install plugins for SEO and security. Otherwise, users won’t find your store, and hackers will attack your store.
For Search Engine Optimization you can use the Yoast SEO plugin. This plugin will help you optimize your site for SEO. You don’t have to worry about adding schema, meta description, and Robots. txt, permalinks, etc to your website.
For security, you can try the Sucuri WordPress security plugin. Although there are free plugins available like Wordfence, it is better to go with a premium plugin like Sucuri.
Step 8: Add Your Products
After configuring your theme, now it is time to upload your products to your store. To upload a product, go to Products from your dashboard and click on the Add new button.
When you upload products, you need to add these:
- Product name
- Price
- Main product image
- Additional product images
- Product Description
- Short product description
- Product category.

And you are done. You are now ready to launch your eCommerce store and start to earn from the venture.
Moreover, you need to promote your eCommerce store as well. For that, you can,
- Offer special deals or discounts
- Use your social profiles
- Target and research your audience
- Create a blog page and publish helpful content and more.
FAQ(s)
Yes. With its advanced plugins and regular releases, WordPress makes sure that your site is safe from any vulnerabilities.
With WordPress.com it’s easy to collect payments on your website. You can sell physical or digital goods, accept monthly donations, and provide access to exclusive content to paying subscribers. Your premium content can also be delivered automatically to your followers’ inboxes as a paid newsletter.
3 Things Every Website Should Include-
– Clear description of who you are.
– Contact page.
– Easy mobile navigation.
Create Your Dream eCommerce Website with WordPress in Minutes!
We are at the end of our tutorial and hopefully you have become a master of creating your own eCommerce store.
WordPress makes it easy to create any kind of website. And with WooCommerce, creating an eCommerce site has become quite easy as well. You just have to follow the right guide and know the right steps. We have tried to show you all the steps to creating an eCommerce store from scratch.
If you follow these steps then you can easily create your own eCommerce store in no time.